You’re doing well in testing. Your systems and business processes are well covered. Test automation is on track. Your reports are nice, shiny, and green. All is good.
But then you go for a beer with your colleagues.
You discuss your daily work. And, at least in Vienna (Austria), it is traditional (and not uncommon) to open up with friends, share your workday, and even complain in such a setting. You realize there’s still lots to do.
Every morning, failed test cases need to be analyzed and filtered. Some flaky tests are keeping the team busy – they are important tests, but they refuse to stabilize. Changes in product and interfaces are breaking your tests, thus requiring maintenance. The team must refactor and weed out redundant tests and code multiple times.
In short, it seems there is a lot of work to be done.
This article will guide you through some test automation pain points that will likely sound familiar. But every problem also has a solution. Along with the pain points, we’ll also highlight possible approaches to alleviate them. For most of these issues, Nagarro has also developed mature solutions (see our “AI4T“) – but that is not what this article is about.
What’s cooking?
Innovation is like cooking – it is about listening to feedback and striving to improve by not being afraid to experiment and bravely trying out new things.
We’ve prepared this dish many times – so you need not start from scratch! And to top it off, we’ll even provide a basic recipe to get you started.
== First Recipe ==
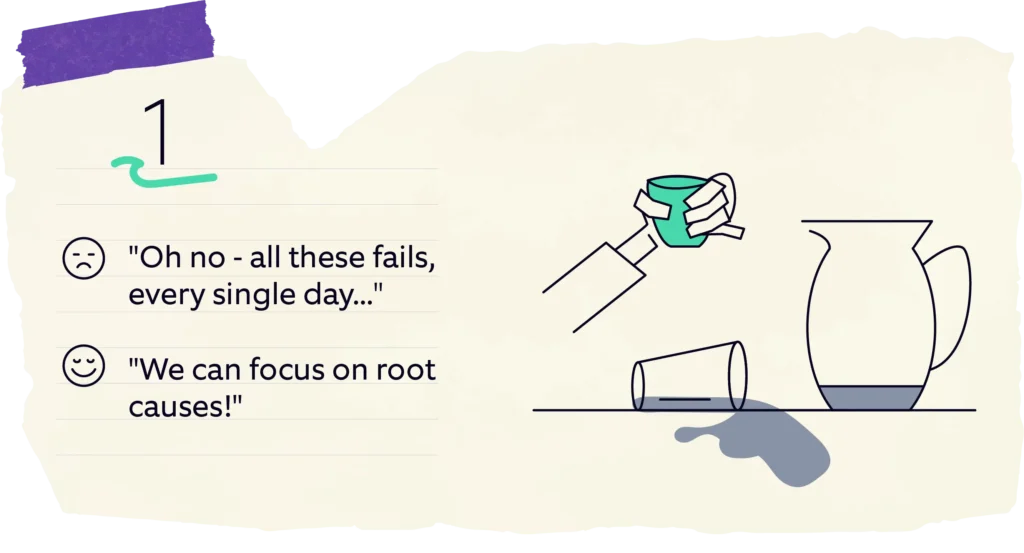
From “Oh no – all these fails, every single day…” to “We can focus on root causes!”
You come into work (be it remotely or in the office). You’re on “nightly run duty.” Some tests in your portfolio have failed.
Step 1: You sit down and start sifting through. After about two hours, you identify seven different root causes and start working on them.
Step 2: Fixing test scripts, fixing environment configurations and logging actual issues.
Wouldn’t it be nice to skip step 1? Let’s say you have 3000 automated system test cases. And about 4% of them fail. That means 120 failed tests to analyze. Each and every day. That’s a lot of work.
But you do have a lot of historical data! Your automated tests and the systems you’re testing produce log files. You need to analyze the root cause – so if you capture it somewhere, you have a “label” to attach to each failed test case.
And that is precisely what you can use to train a Machine Learning algorithm.
So from now on, in the morning, you get a failed test result and a presumed root cause associated with it. This enables you to look in the right places, assign it to a specific team member with special skills, and skip all tests with the same root cause you just fixed. What an effective and efficient, wonderful and mouth-watering prospect, isn’t it?
== Second Recipe ==
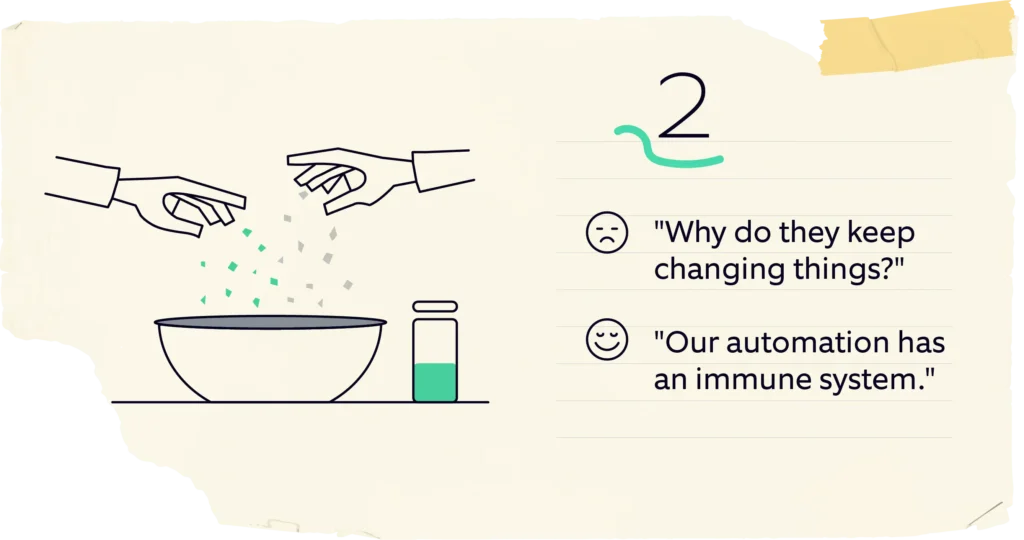
From “Why do they keep changing things?” to “Our automation has an immune system.”
Systems change in an agile world (and even in a “classical” world). A lot. Both on the User Interface side and on the backend. The bulk of a test automation engineer’s time is spent on maintaining tests or changing them along with the product they test.
Now imagine, wouldn‘t it be great if your automation framework could, when some interaction with the system under test fails, check if it is likely an intended change and automatically fix the test?
Let’s say your “OK” button is now called “Confirm”. A human would likely take this change, maybe make a note of it but largely ignore it. It’s most likely they would not fail the test case. But guess what, your test automation might stumble here. And that means:
- Analyzing the failed test case
- Validating the change manually (logging in, navigating there etc.)
- Looking for the respective automation identifiers
- Changing them to the new values
- Committing those changes
- Re-running the test
All this can easily consume about 15 minutes. Just for a trivial change of word-substitution. We do want to know about it, but we don’t want to stop the tests. Imagine if this change is in a key position of your test suite – it could potentially block hundreds of tests from executing!
Now if your framework has some way of, instead of failing, noticing that “OK” and “Confirm” are synonyms, and validate some other technical circumstances to be confident that “Confirm” is the same button as “OK” used to be, it can continue the test.
It can even update the identifier automatically if it is very confident. Of course, it still notifies the engineer of this change, but it is easy for the engineer to take one quick look at the changes and decide whether or not they are “safe”.
== Third Recipe ==

From “AI in testing? That means huge amounts of data, right?” to “We already have all the data we need.”
Machine Learning requires thousands of data points, right? Maybe, even millions?
Yes and no. Let’s take our example from the first delicacy – finding out the root causes for failed test cases based on log files. Since log files are fairly well-structured and deterministic, they are “easy” to learn for an ML algorithm – the usual complexities of human speech are substantially reduced here. This means we can use ML algorithms that are on the simpler side. It also means that we don’t need as much data as we would need for many other use-cases.
Instead of tens of thousands of failed test cases labeled with the root causes, we can get to an excellent starting point with just about 200 cases. We need to ensure they cover most of the root causes we want to target, but it is much less work than you would have expected.
Add to that the fact that test automation already produces a lot of data (execution reports, log files for the automated tests, log files for the systems under test, infrastructure logs, and much more) – which means that you’re already looking at a huge data pool. And we‘ve not even touched production logs as yet.
One can gain many crucial insights through all this data. It is often untapped potential. So take a look at the pain points, take a look at the data you have, and be creative! There is a hidden treasure amidst the ocean of information out there.
== Fourth Recipe ==
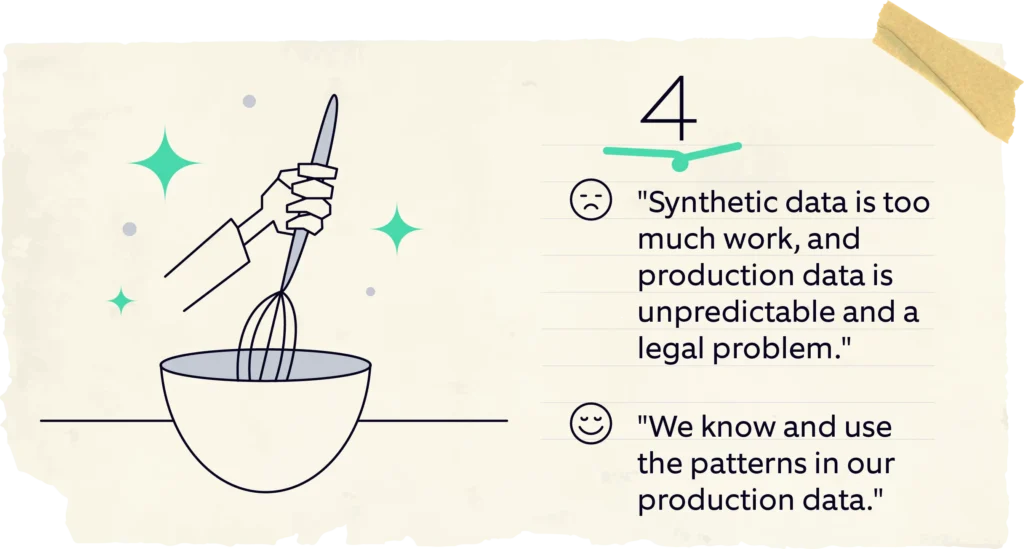
From “Synthetic data is too much work, and production data is unpredictable and a legal problem” to “We know and use the patterns in our production data.”
Many companies struggle with test data. On the one hand, synthetic test data is either generated in bulk, making it rather “bland,” or it is manually constructed with a lot of thought and work behind it.
On the other hand, production data can be a headache – it is not only a legal thing (true anonymization is not an easy task) but also something about which you don’t really know what’s in there.
So how about, instead of anonymizing your test data, you use it to replicate entirely synthetic data sets that share the same properties as your production data while adding constellations to cover additional combinations?
Ideally, this is an “explainable AI” in the sense that it learns data types, structures, and patterns in the data from production. But instead of “blindly” generating new data from that, it provides a human-readable rule model of that data. This model can be used to generate as much test data as you need – completely synthetic but sharing all the relevant properties, distributions, and relations with your production data. The model can also be refined to ensure that it suits the test targets, even more, learned rules can be fixed, unnecessary rules can be removed, and new rules can be added.
Now you can generate useful data to your heart’s content!
== Fifth Recipe ==

From “What is our automated test suite doing, actually?” to “I can view our portfolio’s structure at a single glance.”
Test coverage on higher test levels is always a headache. Code coverage often does not tell you anything useful at that level. Traceability to requirements and user stories is nice, but they also don’t really give you a good overview of what the whole portfolio is actually doing.
To get this overview, you have to not only dig through your folder structure but also read loads of text files, be they code or other formats, such as Gherkin.
But wait, there’s a catch here – Each test case, in a keyword-driven or behavior-driven test automation context, consists of reusable test steps at some level, representing an action. It could be a page-object-model-based system, or it could attach to APIs – either way, if our automation is well-structured with some abstraction on its business-relevant actions, the test cases will pretty much consist of a series of those actions, with validations added into that mix.
Now, let’s look at test cases as a “path” through your system, with each action being a step or “node” along the way. If we overlap these paths on all your test cases, we can quickly see the emergence of a graph. This is the “shape” of your test automation portfolio! Just one brief look gives you an idea of what it is doing.
Now we can add more info to it: Which steps have failed in the last execution (problematic color nodes as red)? How many times is a certain action performed during a test run (use a larger font for often-executed test steps)?
These graphs quickly become quite large. But humans are surprisingly and incredibly good at interpreting graphs like this. This now enables you to get a very quick overview and find redundancies, gaps, and other useful insights.
== Sixth Recipe ==

From “We run everything, every single time. Better safe than sorry” to “We pick the right tests, for every change, every time.”
Large automated test portfolios can run for hours, if not for days. Parallelization and optimization can get you very far. But sometimes, resources are limited – be it in systems, data, or even hardware. Running all tests every single time becomes very hard, if not impossible. So you build a reduced set of regression tests or even a smoke-test set for quick results.
But then, every change is different. A reduced test set might ignore highly critical areas for that one change!
So how do you pick tests? How do you cover the most risk, in the current situation, in the shortest time?
Much like cooking a nice dish, there are many aspects that go into such a selection:
- What has changed in the product?
- How many people have touched which part of the code and within what timeframe?
- Which tests are very good at uncovering real issues?
- Which tests have been run recently? How long does this test take?
Again, you’ll see that most of this data is already available – in your versioning system, in your test reports, and so on. While we still need to discuss “what does ‘risk’ mean for your particular situation?” (a very, very important discussion!), it is likely that you already have most of the data to then rank tests based on this understanding. After that, it‘s just a matter of having this discussion and implementing “intelligent test case selection” in your environment.
== Seventh Recipe ==
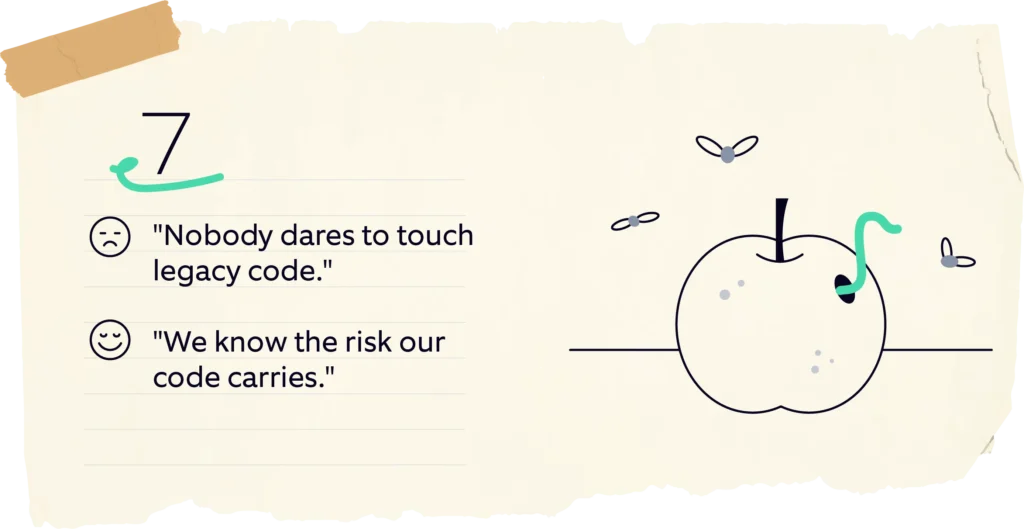
From “Nobody dares to touch legacy code” to “We know the risk our code carries.”
Continuing on the topic of “risk,” we noticed something else: After spending a lot of time with a certain codebase, experienced coders get very good at knowing which code changes are dangerous and which are not.
But then, there is always some system-critical code written by a colleague who left many years ago, written many years before that. There is code that came from a vendor who is no longer a partner of the company. There are large shared code-bases that vertically sliced teams are working on, with no one having a full overview of the whole. And there are newer, less experienced colleagues joining up. On top of that, even experienced people make mistakes. Haven’t all of us experienced such scenarios?!
There are many systems to mitigate all this. Some examples are code quality measurements, code coverage measurements, versioning systems, and so on. They tell you what to do, what to fix. But they are not “immediate.” Imagine, you’re changing a line of code – you’re usually not looking up all of these things, or the full history of that line, every single time.
So how about a system that integrates all these data points:
- Is this line covered by tests?
- How often has it been changed by how many people in the last two days
- How complex is it?
- How many other parts depend on in?
We can also factor in expert opinions by, let’s say, adding an annotation. Then we use all this information to generate a “code risk indicator” and show it next to the class/method/line of code. “0 – change this. This is pretty safe”. “10 – you better think about this and get a second pair of eyes plus a review”. If you click on it, it explains all these points and why this score was given directly in your IDE.
The purpose is not to fix the risk, although it can be used for that too. But the primary objective is to give developers a feeling of the risk that their changes carry, before they make them.
== Eighth Recipe ==
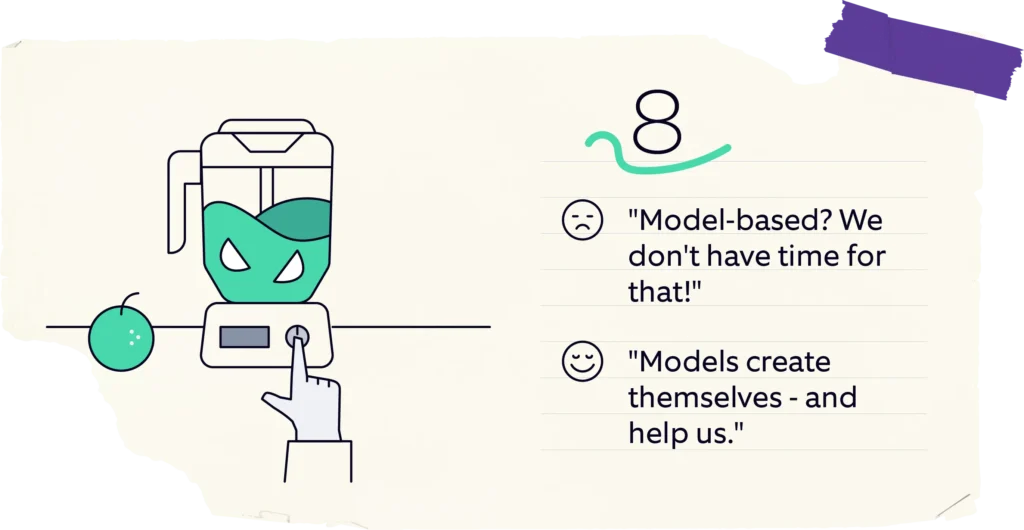
From “Model-based? We don’t have time for that!” to “Models create themselves – and help us.”
Model-based testing has been on many people’s minds for many years. But it seems it never really “took off.” Part of the reason might be the complexity of these models, coupled with the fact that these models need to be built and maintained by experts. Apart from this, while these models are very good at generating many tests, they usually have blind spots around the expected outcomes of these tests.
So in most cases, model-based testing is not regularly applied and still has a lot of potential!
So how can we mitigate these issues? By automatically generating a usable model from the available information. You can use many methods and sources for this, like analysis for requirements documents, analysis of code, dependencies, and so on. The flip side of these methods is that the model is not “independent” of these sources but is an interpretation of their content.
But that does not mean that they can’t be useful.
Think back to our “fifth recipe” – generating a graph from our automated test suite. This is actually a state-transition model of our tests and, by extension, the product we’re testing (because the structure of our tests reflects the usage flow of that product). And it has potential.
We could, for example, mark a series of connected nodes and ask the system to generate basic code to execute these test steps in sequence. They will then be manually completed into a full test case. We could ask the system, “is there a test case connecting these two nodes?” to increase our coverage or “are there two tests that are both covering this path?” to remove redundant tests.
Since this model is not created manually, and since the basis, it is generated from (automated tests) is maintained to be in sync with our product, we do not need to spend any extra time to maintain this model either. And it has a lot of use-cases.
== Our traditional recipe ==
Ingredients:
- 5 annoying everyday tasks and pains
- A fridge full of data you already have
- 1 thumb-sized piece of knowledge about Machine Learning
- 20g creativity
Instructions:
- Stir your thoughts, complain about the most annoying things
- Add creativity, mix well
- Take the knowledge about ML out of the package
- Add it to the creative mix, gently stir in the data
- Bake in the oven at 200°C, for the duration of an MVP
- While baking, check progress and generated value repeatedly
- Take out of the oven, let rest for a bit
- Serve while hot – best served with a garnish of practical experience
Have fun and enjoy this dish!
If you have any questions on the test automation and software testing process improvement, don’t hesitate to contact us at aqt@nagarro.com.
Download your free infographic with all 8 recipes!
Author

Thomas Steirer CTO and Lead of the Global Test Automation Practice
Thomas Steirer is CTO and Lead of the Global Test Automation Practice. He has developed numerous automation frameworks and solutions for a variety of industries and technologies. At Nagarro, he supports clients implementing test automation and building scalable and sustainable solutions that add value. He is also passionate about using artificial intelligence to make test automation even more efficient. In his spare time, he teaches at universities in Austria and is an enthusiastic Gameboy musician.
Nagarro was a exhibitor at AutomationSTAR 2024.